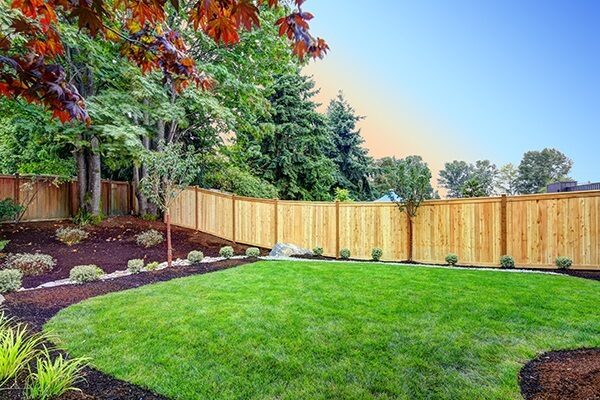
Even though the fence is an often-overlooked aspect of a home, it serves a variety of useful purposes. From protecting your yard from animals and potential intruders to providing an extra barrier against inclement weather and loud neighbors, a privacy fence is a great way to ensure your property truly stays private.
Putting up a fence can require a significant amount of time and work, so it’s good idea to learn some of the basics before you begin a fence project. Get started here with our 8 steps on how to build a fence.
1. Check property lines and local building codes
Don’t even think about digging up spots for your fence until you do your research. Fence construction can be highly regulated; your city, neighborhood or local homeowners association may have specific codes you need to follow. These codes typically govern certain features of your fence, such as its style or height.[1]
In addition, you’ll also need to check and mark your property line to determine where exactly you’re able to place fencing. Refer to your home’s plat — the official map of your property that shows its boundaries and measurements. If you don’t have this on hand, you may be able to obtain a copy from your county’s clerk or surveyor.[2]
Once you’ve done all of the research, it’s in your best interest to review your fence plans with your neighbors. Make sure you don’t build something that will be an eyesore or obstruct their view in any way.
2. Select the type of fence
After doing your fence code and property line research, you’re now ready to select your fence type. There are several different kinds of fences out there, but for your typical DIY privacy fence, you’re probably looking at building a fence that’s mostly constructed with prefabricated panels. In this case, you’ll need to decide on the style of fence you want to build in order to figure out what fence panel widths are available. Knowing the panel specifications will also impact how you plan and measure your fence.
3. Measure and mark the layout
The fence installation process starts with thorough measuring. Follow these steps for measuring and notating your fence layout[3] :
- Measure entire fence line. Measure the entire fence line including gates. A measuring wheel can be helpful for extensive layouts. Use spray paint or chalk to outline your fence, and label gate locations.
- Determine how many panels you need. Subtract the total lengths of your gates from the total fence footage, then divide this number by the panel length of your desired fence style. This will determine how many panels you need. Any remaining footage will have to be filled in with a partial panel or pickets.
- Determine how many fence posts you’ll need. To gauge how many fence posts you’ll need, divide your fence length by the post spacing. Typically, you’ll want to place a post every 6 to 8 feet.
4. Gather tools and materials
With your fence measured and laid out, it’s time to gather your tools and materials. Here’s what you’ll need for building a wood fence.
- Post hole digger
- Hammer
- Power drill
- Tape measure
- Level
- Fence panels
- Fence posts
- Nails
- Screws
- Concrete mix
5. Dig holes and set posts
The fence posts need to be positioned before the rest of your fence can be constructed. Place a post every 6 to 8 feet along your fence line, making sure the distance between each post is the same.
Use a post hole digger to dig a hole that’s approximately as deep as 1/3 of the height of the fence post. For example, a 6-foot post would require a hole that’s about 2 feet deep. As you’re digging, keep an eye out for utility lines and pipes.
For each post hole, pour in about 3 to 4 inches of gravel. On top of the gravel, add about 6 to 8 inches of concrete mix. Place your post in the middle of the mixture, then plumb the post with a level to check that it’s properly positioned. Follow the instructions on your concrete mix to find out how long it should take to fully dry and set (note that this can take up to a few days).[3]
6. Install rails to the posts
After the concrete at the base of your posts has fully set, you can begin attaching the rails to the posts. How many rails you need depends on the height of your fence. For a privacy fence, you probably will need at least three rails: one at the bottom edge of your fence, one in the middle and one on the top edge. You can attach rails with either a power drill and deck screws or just a hammer and nails.[3], [4]
7. Attach pickets to the rails
You can attach pickets to rails using the same drill or hammer method you used for installing the rails in step 6.[3]
Keep in mind that using panels instead of pickets will make for a much quicker and simpler building experience. Panels can usually be attached directly to the posts, taking away the hassle of installing rails and attaching pickets one at a time.
If you do decide to use panels, consider installing a removable panel somewhere along your fence. These kinds of panels can be easily detached to create a larger entryway into your yard, should you ever need to receive a large delivery to your home.
8. Install the gate
The gate is the finishing touch for your fence. If you haven’t installed your gate posts yet, you can do so in the same way you would install normal fence posts (see step 5). Once the posts are in place, grab a drill, a screwdriver, and the necessary hardware; for a basic gate, you just need screws, your chosen locking mechanism, and the right size hinges.
First, measure twice and predrill where you plan to attach the hinges on your gate section and the gate posts. Then, screw the hinges onto your gate. After that, attach the gate to your posts. Finally, install your locking hardware as recommended by the manufacturer.[5]
Following these fence building tips can help protect your property from outside elements, but if you want full coverage, you’ll need to make sure your home insurance is up to date. See what a regular home insurance checkup can do for you.
[1] “8 Things to Consider Before Building a Fence for Your Home,” (March 4, 2016)
[2] “How Do I Know Where My Property Lines Are?” (May 5, 2014)
[3] “How to Build a Fence,” (accessed Oct. 12, 2020)